Configuring VPN with L2TP for Microsoft Windows
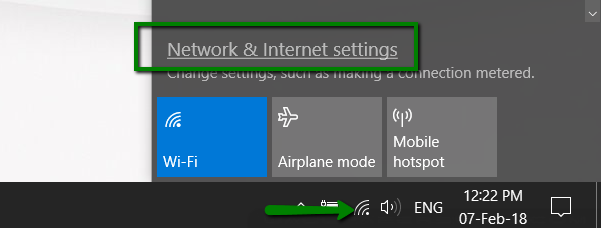
1. Click on the Network icon (tray icon) and then click Network & Internet settings:
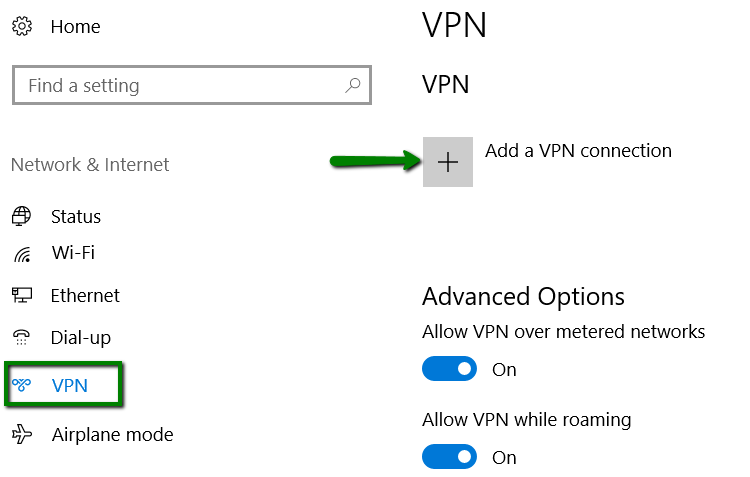
2. Go to VPN > click + Add a VPN Connection:
3. Enter the following details:
VPN Provider: Windows (built-in)
Connection name: name for your new VPN connection
Server name or address: vpn.phx.web-hosting.com
VPN Type: L2TP/IPsec with pre-shared key
Pre-shared key: from your Welcome Email
Type of sign-in info: Username and password
Username (optional): VPN username from your Welcome Guide
Password (optional): VPN password from your Welcome Guide
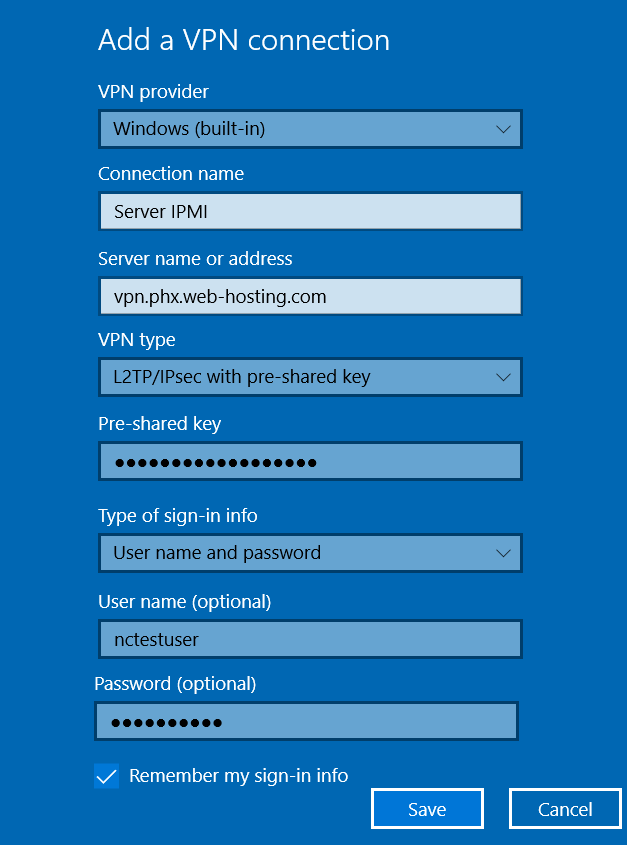
Click Save.
- Open Network and sharing center> Change adapter settings > Choose VPN connection > Properties > Networking > Choose Internet Protocol Version 4 (IPv4) > Properties > Advanced > Uncheck "Use default gateway on remote network":
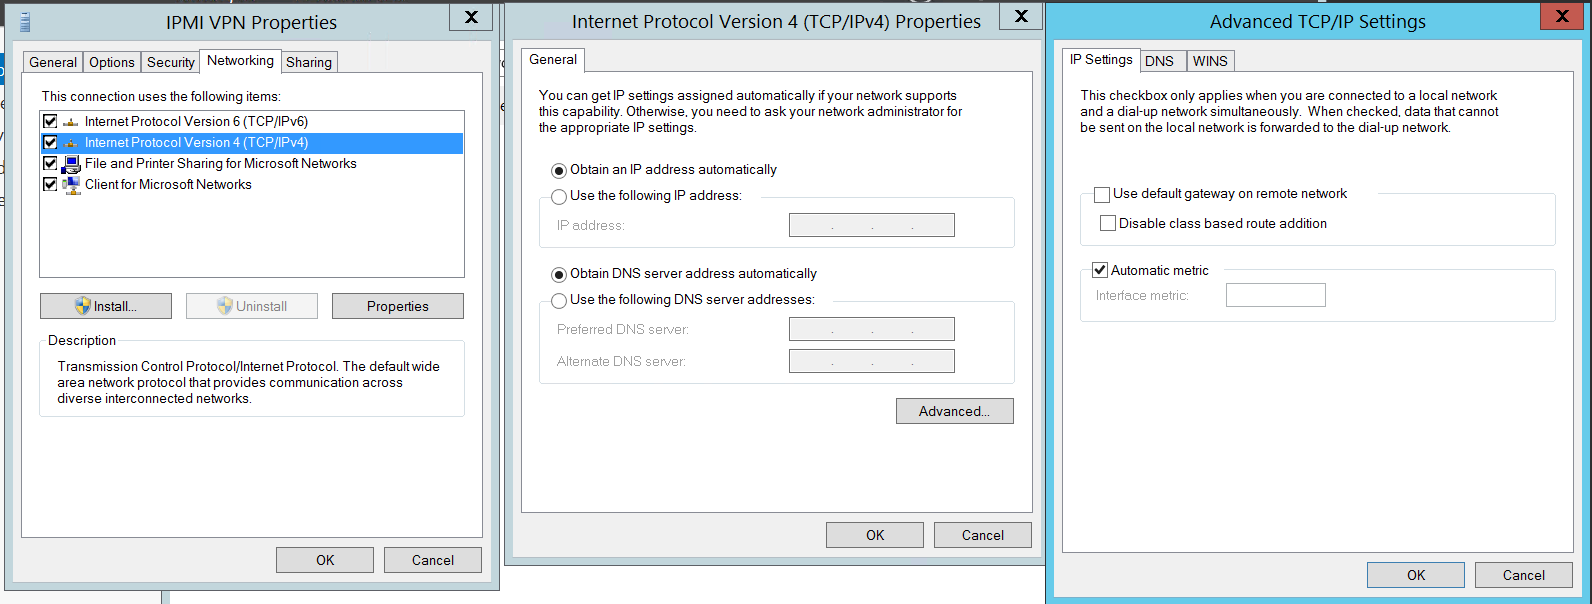
Now it is possible to connect to IPMI VPN.
Configuring VPN with L2TP for Linux
Taking into consideration a wide variety of Linux distributions and desktop environments, there's no single guide for all of them.
Run the command:
sudo add-apt-repository ppa:nm-l2tp/network-manager-l2tp
sudo apt-get update
sudo apt-get install network-manager-l2tp
sudo apt-get install network-manager-l2tp-gnome
If you use Network Manager for configuring VPN, you can use the following instructions:
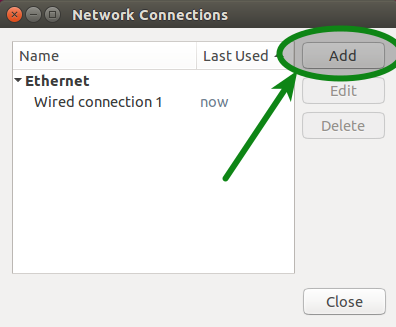
1. Open Dashboard of your Linux Distributive, type Network Connections and find the corresponding icon in the search bar:

2. Click the Add button:
3. Select Layer 2 Tunneling Protocol (L2TP) from the drop-down menu and click Create.
4. Use the following settings:
Gateway: vpn.phx.web-hosting.com
User name: VPN username from the Welcome Guide
Password: VPN password from the Welcome Guide
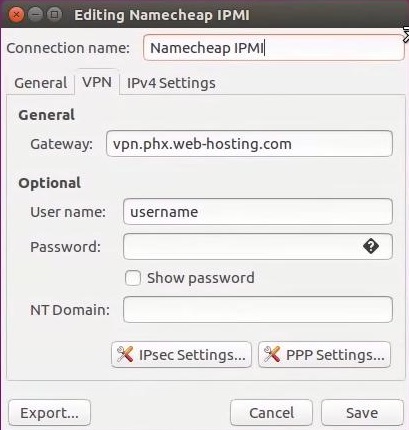
5. Click IPsec Settings
Use the following settings:
Pre-shared key: your pre-shared key from the Welcome Email
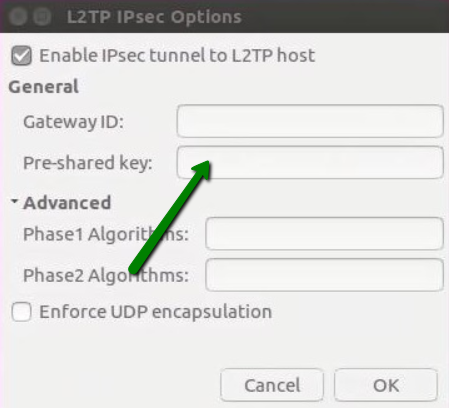
Click Ok
Click Save
5. Open Settings > Network > VPN connection Settings > IPv4 > Check "Use this connection only for resources on its network":
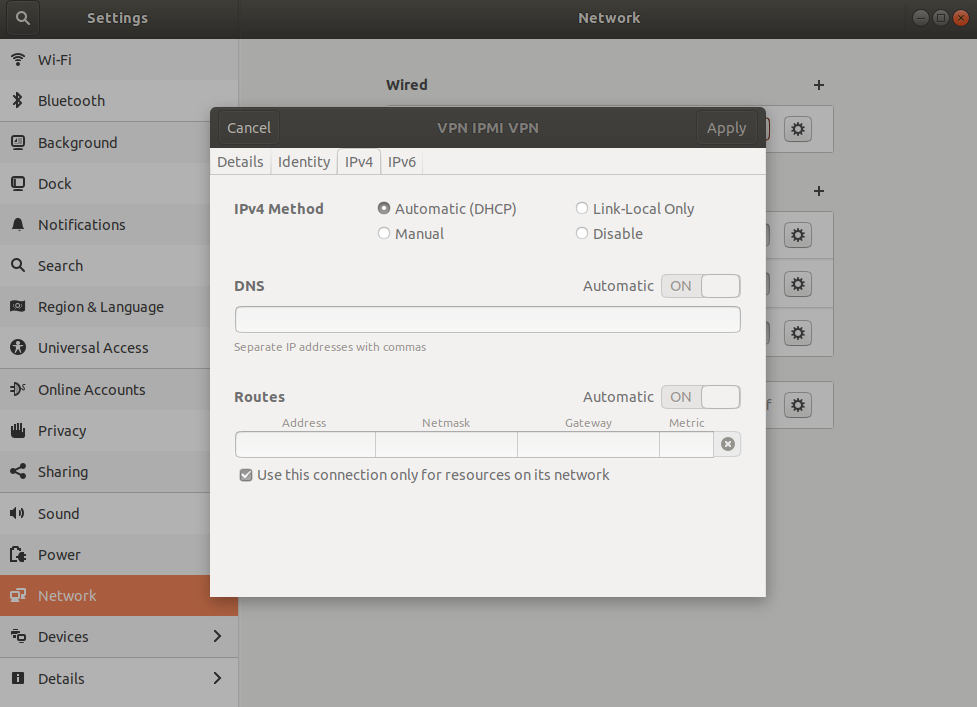
Now, it is possible to connect to IPMI VPN.
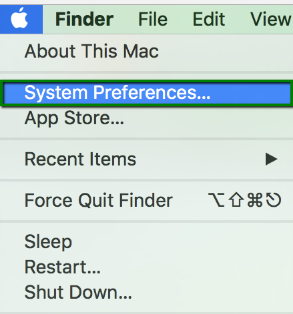
Configuring VPN for Mac OS
1. Go to System preferences:
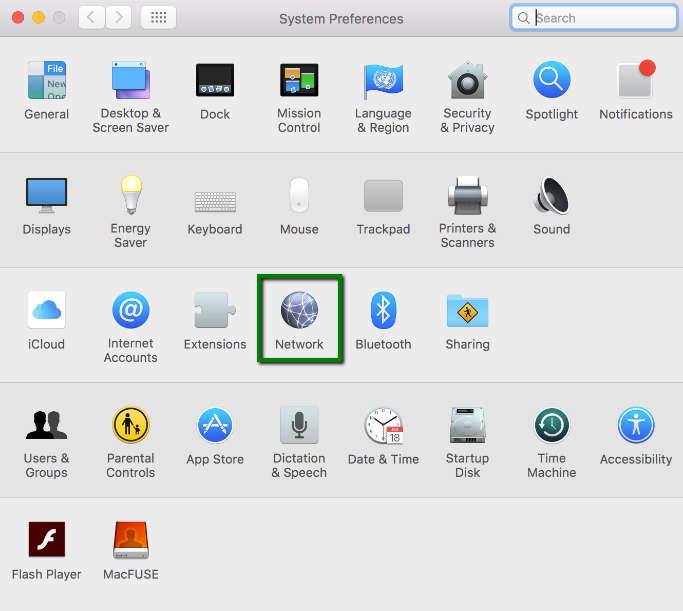
2. Choose Network then:
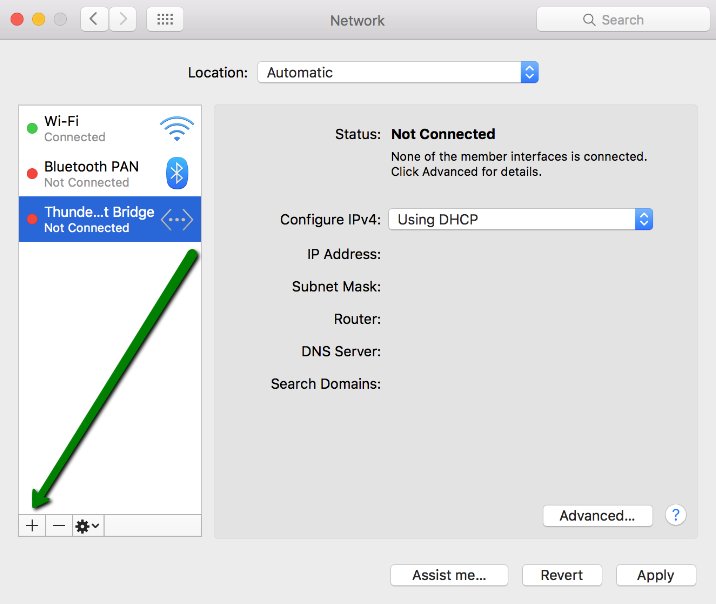
3. At the bottom left corner of the new window press + to add a new connection:
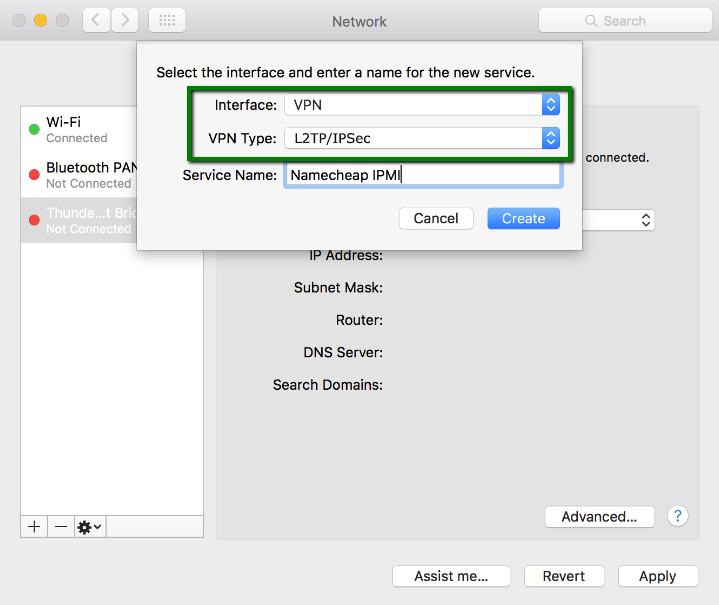
4. Choose VPN as a connection interface and L2TP/IPSec as the VPN Type, specify the name of the new connection service.
Click Create:
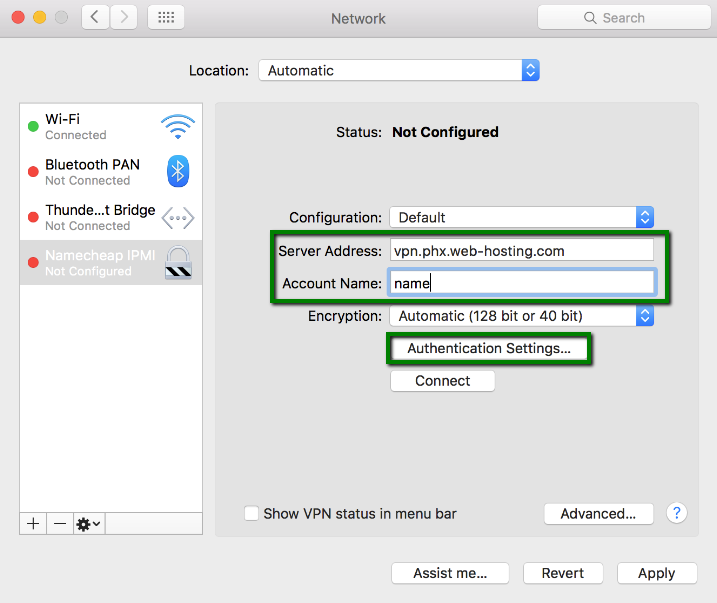
5. Select your newly created connection from the list and add the following settings:
Server address: vpn.phx.web-hosting.com
Account name: VPN username from your Welcome Email
Click on the Authentication settings button:
6. Select password authentication and enter VPN user and password from the Welcome email, then press OK:
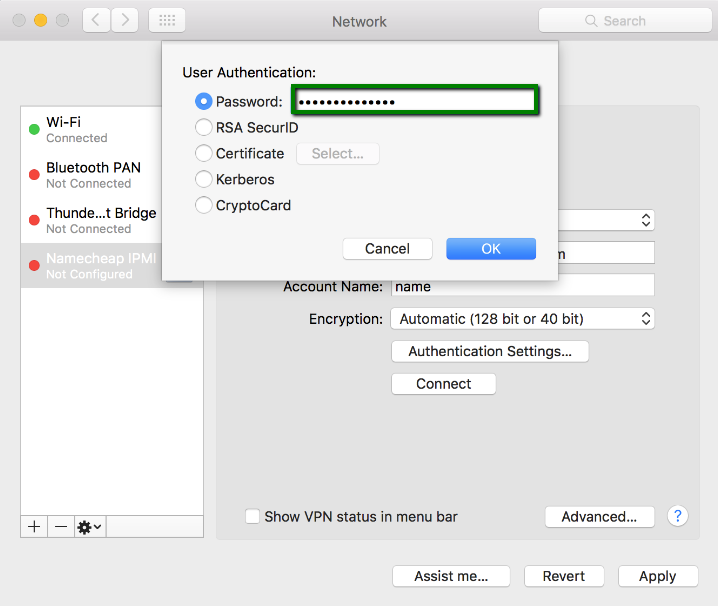
NOTE: New Mac versions starting from macOS 10.12 strictly require a shared key. To set it up, click Authentication Settings > enter VPN Password and Shared Key (from your Welcome Email):
7. In order to avoid losing internet connectivity while you are connected to IPMI VPN, click the Advanced button and unselect Send all traffic over VPN connection:
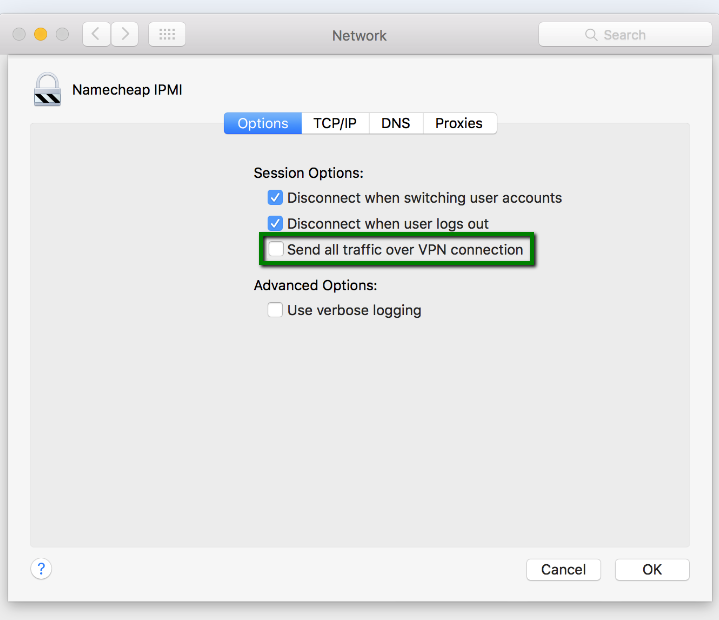
8. Click on the OK button. Now it is possible to connect to IPMI VPN.
How to access your server using the IPMI interface
Once you finished the setup, you should be able to manage your dedicated server through the IPMI interface using the credentials that you received in the Welcome Email.
Don't forget to install Oracle Java (JRE) if you are going to use IPMI console redirection capabilities. Your server has an IPMI address ipmi.web-hosting.com so you can access it in the browser:
- https://ipmi.web-hosting.com (secure connection)
- http://ipmi.web-hosting.com (plain HTTP)
Disregard the certificate warning that might appear if you choose the secure connection. You can safely allow connecting to the IPMI interface and even create a security exception for this case (but only for this one), your data transfer will be encrypted anyway:

If you face some issues not mentioned above, please reach out to our Hosting department via Live Chat or email with the detailed description of the problem.
IPMI User's Guide for additional details
For more information about IPMI, refer to this guide by Supermicro.
