How to Deploy WordPress using WordPress Manager?
Nexi Panel Cloud Offers easy and quick deployment for WordPress manager to make your website experience more easy. Deployment of WordPress on your site is so easy and quick from Nexi Panel Cloud WordPress Manger, you can do it easily with some clicks.
You need to follow following steps in order to deploy WordPress easily from Nexi Panel cloud.
- Login to Nexi Panel Cloud
- Connect your server
- Mange Your Server
- Deploy WordPress on your site
- Pre Requirements to deploy WordPress manager
Login to Nexi Panel Cloud:
In order to processed on WordPress deploy using WordPress manager you must now from where you can access Nexi Panel WordPress manger. First of you have to login to your Nexi Panel cloud account click here to login. If you already have an account provide details and logged in if not you have to sign up to Nexi Panel Cloud.
If you already have an account you can easily sign in if you don’t have then Sign up on cloud and then go for sign in.
Connect your server:
Once you signed in or Signed up on cloud now you have to connect your server to the Nexi Panel Cloud to access the exclusive features of cloud.
Go to the cloud dashboard and here you can see Connect Nexi Panel.
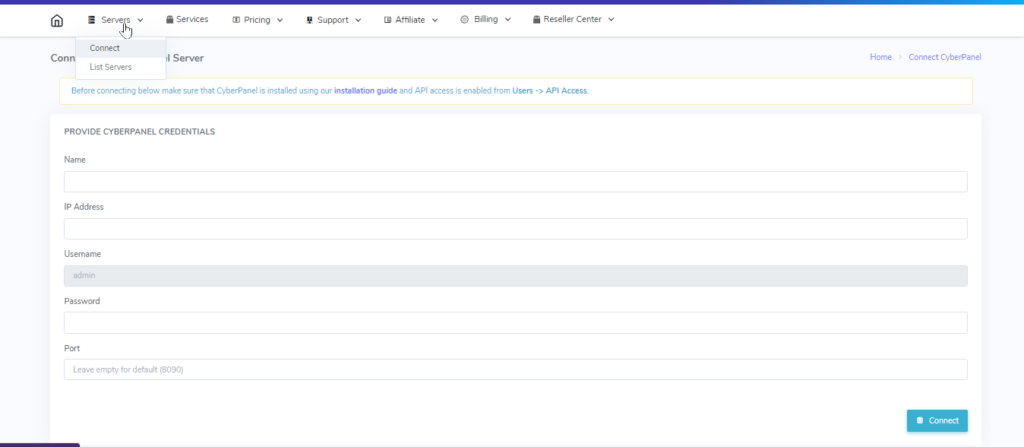
Click on Connect Nexi Panel and Provide the Following details.
- Name (Any you want).
- IP Address (Ip of your server)
- Username (admin as recommended )
- Password (Password for your Nexi Panel)
- Port (Only add if you change port 8090 for Nexi Panel )
IMPORTANT NOTE: In order to connect your server with the Nexi Panel cloud first you have to enable API access from you Nexi Panel. If you cant do it you can,t add server on cloud.
Once you added your server to cloud successfully now got to the Servers section and you can see your server there.
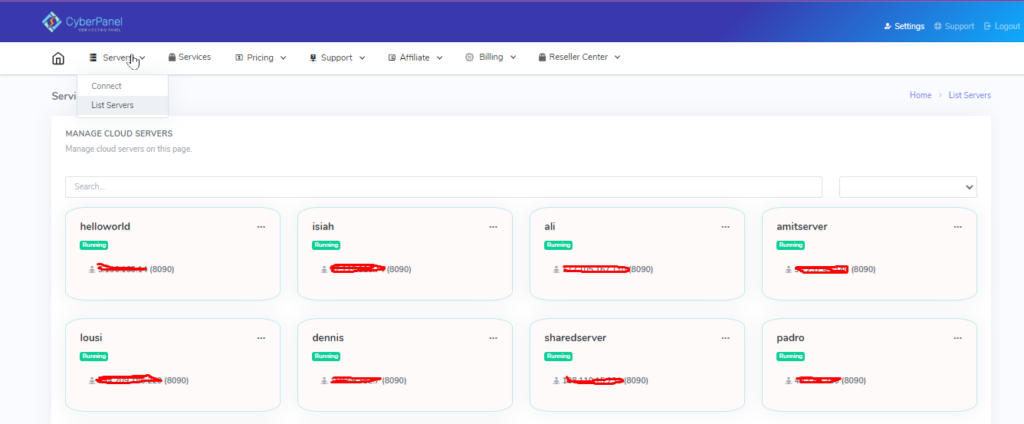
All done for adding server to Nexi Panel Cloud.
Mange Your Server:
After Adding the server to Cloud you can Manage your server from the cloud and get different features from the cloud. Features depends upon the plan you bought from Nexi Panel cloud.
To get the these exclusives features you have to go to Server-> Manage
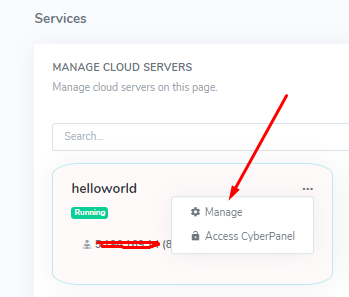
On this Manage page you can get the Features like:
- WP Manager
- Health
- Debugger
- Backups
- Settings
Here we only discuss about the WP Manager. How to deploy WP Manager and some of the features of it. You will get the features from this Cloud Platform according to your plan.
Deploy WordPress on your site:
Now come to the main point on which we want to work on the deployment of WordPress on your site from Nexi Panel Cloud. The deployment of WordPress on your site using Nexi Panel Cloud is so easy and will complete in just few clicks. Follow along to do so.
There are two ways to deploy WordPress on your website from Nexi Panel cloud.
- You can Go to the Settings-> WPWordPress Manager.
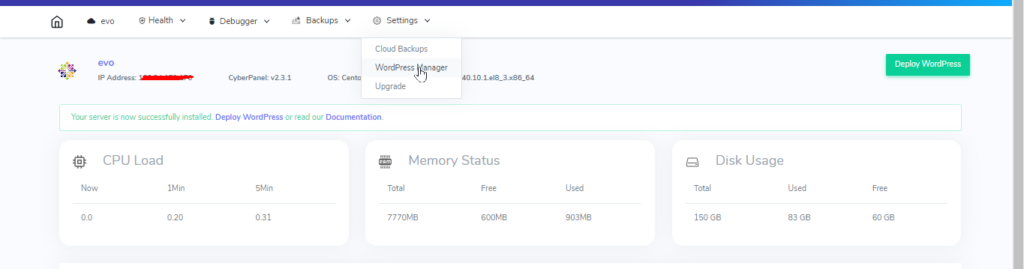
- On the Manage page you can see WP Manager Button. From here you can directly Deploy or list the websites where WordPress is already Deployed.

On clicking the deploy button from WP Manager you can see the page where you can deploy the WordPress on any site. Here you can perform a number of operations i am going to explain you a the process and features one by one. On the deploy page you have to do these steps.
NOTE: NOw we moved the WP Manager inside the Nexi Panel you can use that as addons and deeply follow the guide.
Pre Requirements to deploy WordPress manager:
You need some Pre Requirements to deploy WordPress manager.
- Buy a specific plan that have this option.
- You have Nexi Panel installed on your server
- Account on Nexi Panel Cloud.
